-
Posted: Mon Oct 31, 2011 10:49 pm
The purpose of my trading log is to keep me focused, to learn and to share. Any comments / advice are appreciated. I want to keep to this style of trading after trying different methods I have the most success with this so I am not interested in going in a completely different direction. I want to perfect this S and D stuff, I can't work out riddles either just so you know 
Todays trade.
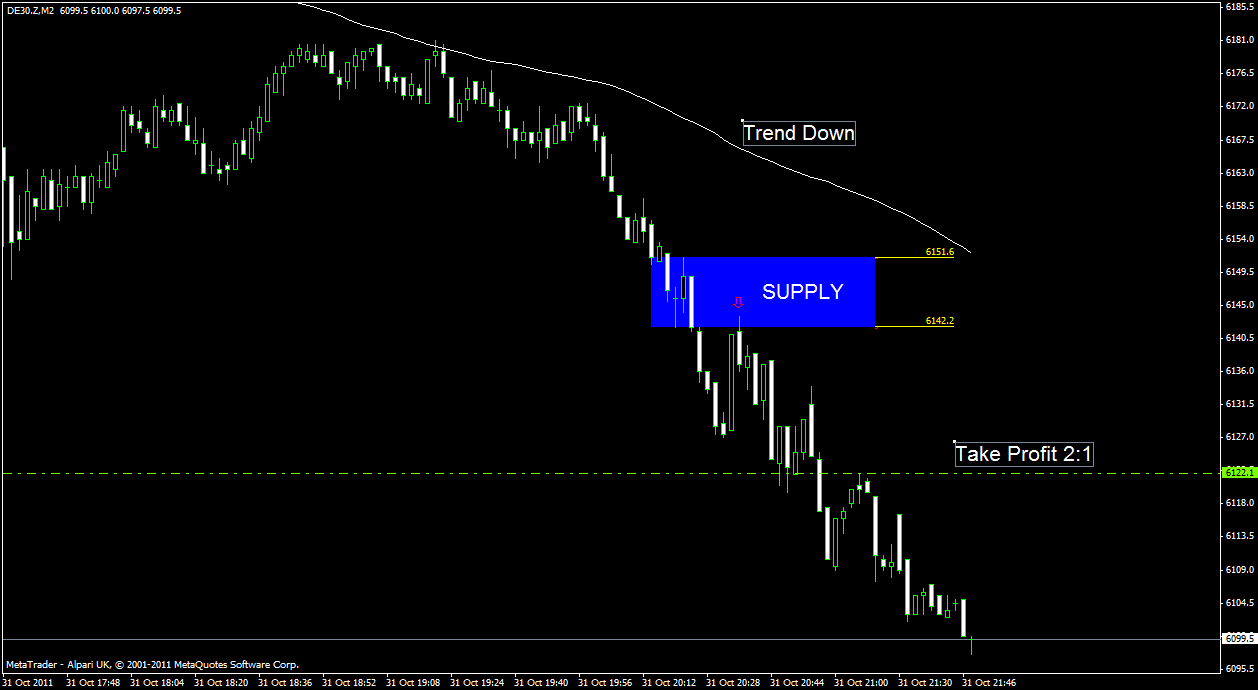
I am sticking to these little setups for the time being. Working off small timeframe charts. German Dax and SP500 only (Dax in this case). I am looking to take the retracements to supply/demand in a trend.
Pretrade check list.
1. Big Picture. In this case not shorting into higher timeframe demand. Well to be honest I skipped this step. Looking back now I see the SP500 was near a demand level at the time of my trade.
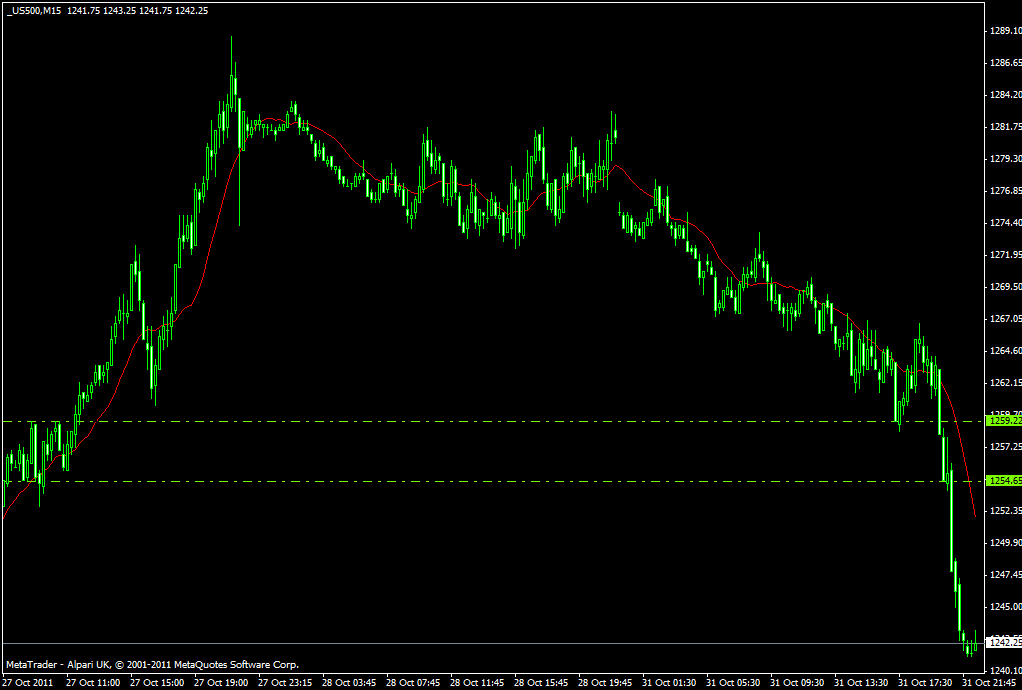
and the Dax itself was in a gap.

This is the reason for this log is to make myself stick to the rules. With this in mind I should have not taken this trade.
2. Risk/Reward. 2:1 Marked up on chart. From the distance price travelled from supply zone on first move and the depth of the supply zone 2:1 looked doable. (Stop is top of supply plus the spread so 1.5 higer up than marked.
3. Freshness of supply zone. Only taking first pullback so check.
4. Move back toward supply. Largish momo candle into supply. As Sam says the quicker they arrive (with no mess) the quicker they will leave. Basically i checked no new demand zone has formed close to the supply zone during the retracement. Check.
5. Trend is in place. MA down and all momo to downside was quickly eating any upwards momo. Check.
Lessons learnt today. Follow all 5 checks.
Also worth noting that there also looked to be a supply zone above the one I took. Levels on levels Sam says they are good.
Cheers, Withnail.
Todays trade.
I am sticking to these little setups for the time being. Working off small timeframe charts. German Dax and SP500 only (Dax in this case). I am looking to take the retracements to supply/demand in a trend.
Pretrade check list.
1. Big Picture. In this case not shorting into higher timeframe demand. Well to be honest I skipped this step. Looking back now I see the SP500 was near a demand level at the time of my trade.
and the Dax itself was in a gap.
This is the reason for this log is to make myself stick to the rules. With this in mind I should have not taken this trade.
2. Risk/Reward. 2:1 Marked up on chart. From the distance price travelled from supply zone on first move and the depth of the supply zone 2:1 looked doable. (Stop is top of supply plus the spread so 1.5 higer up than marked.
3. Freshness of supply zone. Only taking first pullback so check.
4. Move back toward supply. Largish momo candle into supply. As Sam says the quicker they arrive (with no mess) the quicker they will leave. Basically i checked no new demand zone has formed close to the supply zone during the retracement. Check.
5. Trend is in place. MA down and all momo to downside was quickly eating any upwards momo. Check.
Lessons learnt today. Follow all 5 checks.
Also worth noting that there also looked to be a supply zone above the one I took. Levels on levels Sam says they are good.
Cheers, Withnail.