TygerKrane wrote:So this is my busy season at work and since I'm too busy to have my mind focused to trade, instead I've been watching Sam Seiden video's again.
I must've watched at least 15hours of webinars from the comfort of my office desk this week.
So he puts up this slide of what a good trade setup for him is (according to his views of supply and demand), and in fact it WAS a trade that he took.
I realize it's a frustrating trade situation where I would've (and probably usually) placed the losing trade. Granted, he DOES say that nothing is 100% guaranteed with his entries, but the fact that he chose to put this chart up in his presentation as an ideal situation means a lot.
And so I started thinking...
10min chart, BTW; also he has already defined the area as a Demand Zone (i.e. good for longs) in the higher timeframe context.
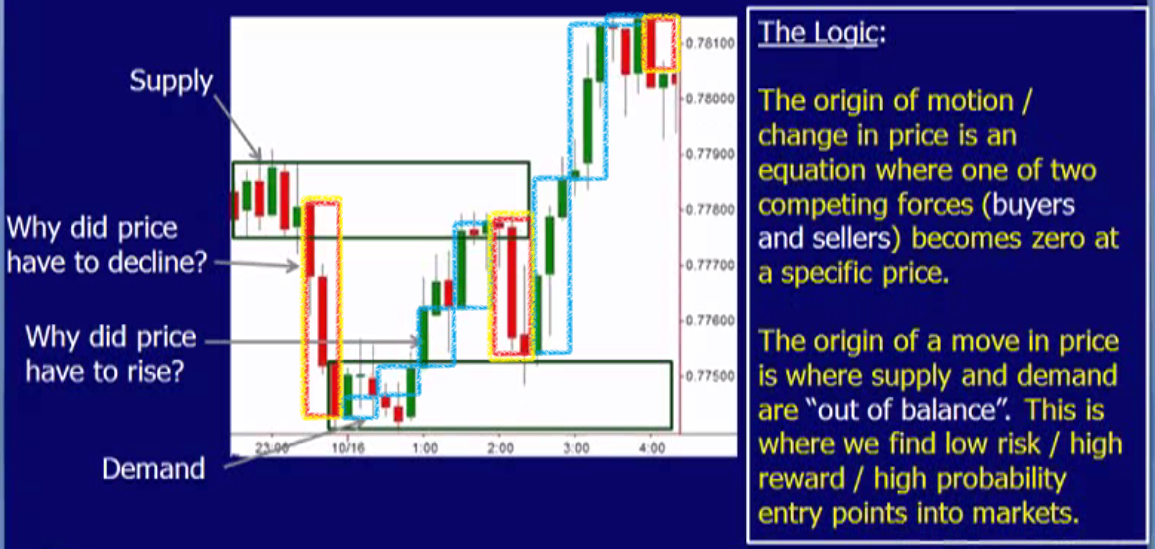
This is how I usually approach the situation:
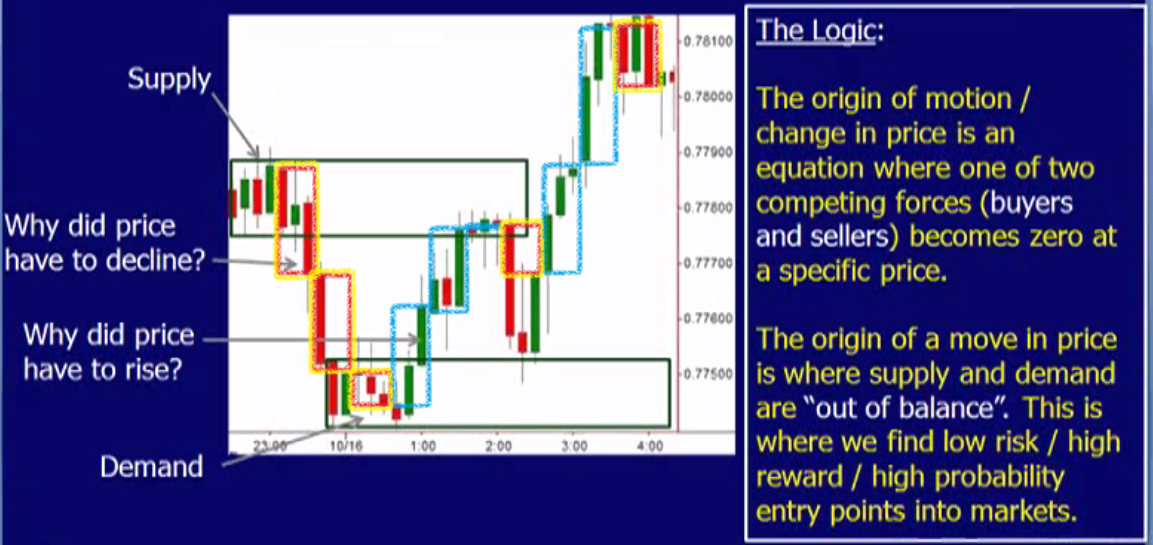
So then I tried to analyze the situation further:
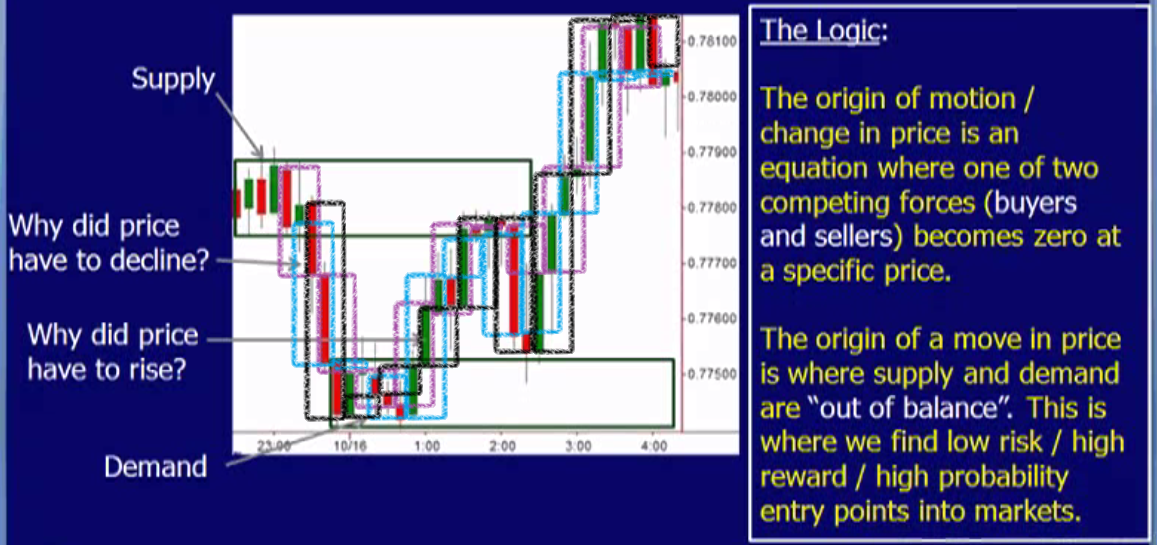
I even tried to 3xCC the area
(here I switched up a color in case that makes it easier for you to read)
I haven't studied 3xCC at all up to this point, so I ask a favor if one of you guys could tell me what the leading CC is in this area. Also, even nicer would be if you could 'talk' me through how you are reading the CC for this small snippet of a chart.
I'd rather not lose anymore to Sam and his simple setup.
But seriously I like to watch his stuff b/c he has a proven track record with his purely Price Action Method. His method seems to look for a lot of the same things we look for. I guess I wonder if I can separate what makes his entry/exit choices different than 'ours', it might could help me filter out which entries/targets I should aim for. (For example, if I think he has an entry opposite of me, then I should go for a smaller target in that case...instead of letting price get to him, and then he runs me over with it.)

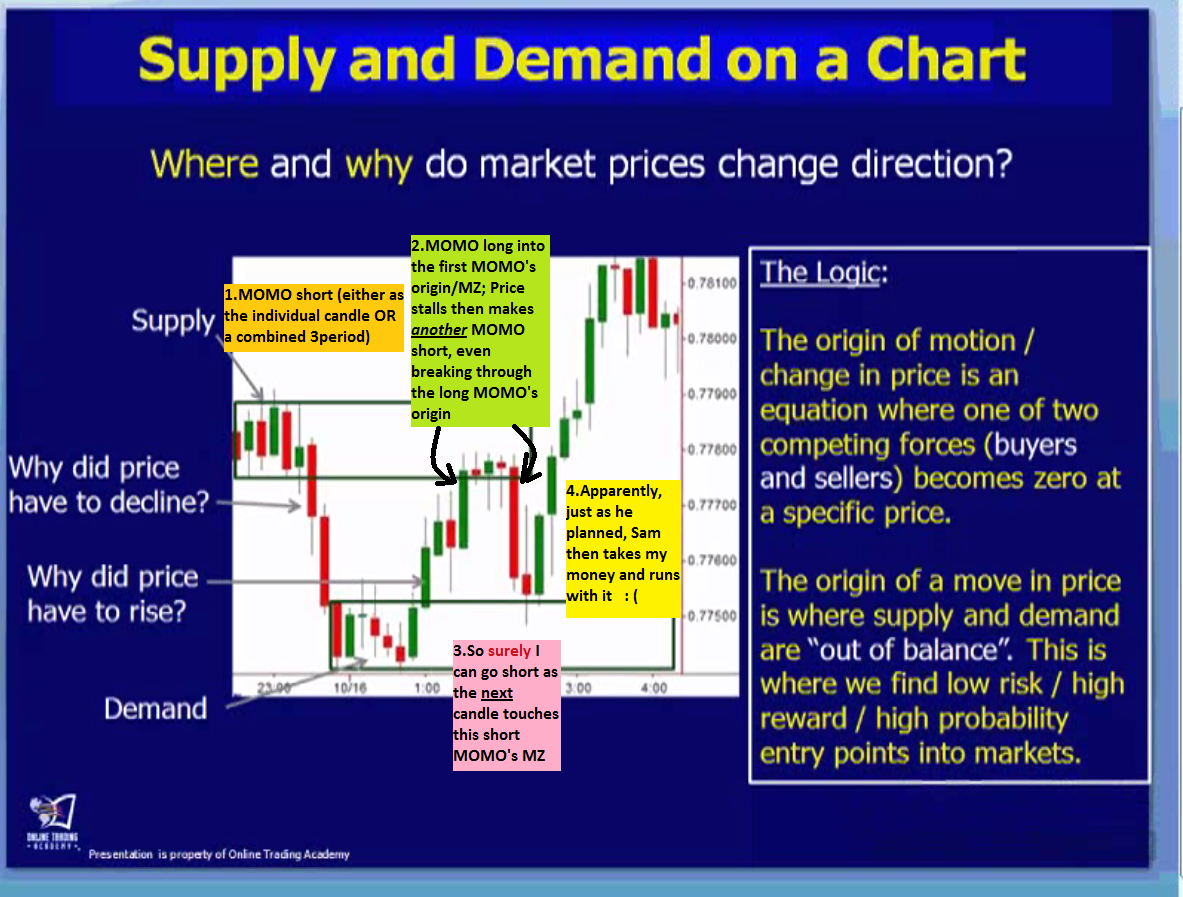


Look at Sam's logic definition it say it all.
Price ranged in a direction because the mass collective saw free money.
They moved their stops near BE and price bounces and screams away
The trick is for "you" to be able to identify when that area is breaking down
to plan your escape. It seems that taking "good" trades goes against normal
instinct. Like he said it's not 100%